Snapshots allow you to capture the current state of a VM, and return it to that point-in-time at your convenience. Snapshots are the closest thing that we have to the Restore Points we had in Windows XP. There are a few things that you need to know about snapshots.
Here is the snapshot process:
1. Pauses the virtual machine.
2. Creates differencing disks associated with all VHDs configured in the virtual machine, and then associates them with the virtual machine.
3. Makes a copy of the virtual machine’s configuration file.
4. Resumes the running of the virtual machine.
5. Saves the contents of the virtual machine to disk.
The snapshot will create some files and store them in the Virtual Machines folder
.xml: virtual machine configuration files
.vsv: virtual machine saved state files
.bin: virtual machine memory contents
.avhd: snapshot differencing disks
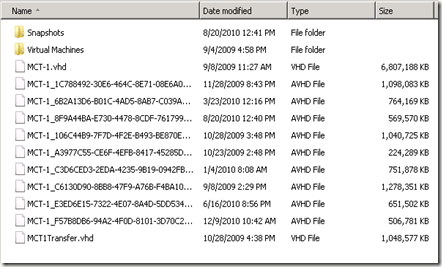
Above is a looking inside a virtual machines folder. Notice the many .AVHD files. Each one of these is for a single snapshot.
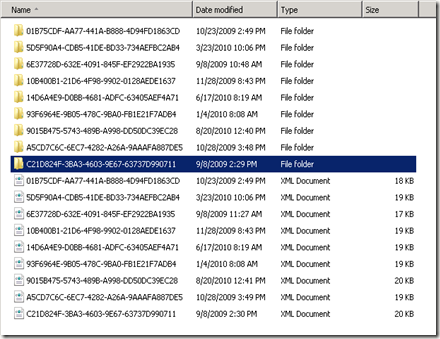
Opening up the snapshots folder, we seethe .xml files that hold the configurations from each of the snapshots. If we open up one of the folders, notice the highlighted on above is a GUID that matches the last .xml file, we see the files containing the memory state and the saved state of the VM snapshot.

- They do not affect a running virtual machine. If a snapshot is taken and a change to the state of the VMs memory is made, Hyper-V will intercept that change and hold it until the snapshot is complete.
- The virtual machine cannot be in a paused state.
- If you take a snapshot while logged in, when you return to that snapshot, it will be right were you took it. This includes being logged in and applications running.
Here is the snapshot process:
1. Pauses the virtual machine.
2. Creates differencing disks associated with all VHDs configured in the virtual machine, and then associates them with the virtual machine.
3. Makes a copy of the virtual machine’s configuration file.
4. Resumes the running of the virtual machine.
5. Saves the contents of the virtual machine to disk.
The snapshot will create some files and store them in the Virtual Machines folder
.xml: virtual machine configuration files
.vsv: virtual machine saved state files
.bin: virtual machine memory contents
.avhd: snapshot differencing disks

Above is a looking inside a virtual machines folder. Notice the many .AVHD files. Each one of these is for a single snapshot.

Opening up the snapshots folder, we seethe .xml files that hold the configurations from each of the snapshots. If we open up one of the folders, notice the highlighted on above is a GUID that matches the last .xml file, we see the files containing the memory state and the saved state of the VM snapshot.

Comments