In Hyper-V R1, we had the option to export out a VM and then later import it back in again. For many in testing environments, this created large export files when only the VM with a specific snapshot was needed. With Hyper-V R2 we can now create a new VM from a snapshot of another one. This is advantageous because now you can create an entire new VM without all the extra files from other snapshots that you may not want. Take a look at my screen shot below of my snapshot tree.
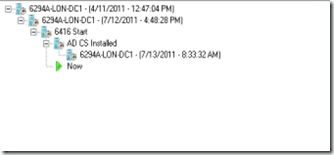
Let’s say that I want to create a new VM from this one. Apply the snapshot that you want to use as the base for the new VM. Right click the VM and select Export. Give it a location and click Export.
One thing that I do not like about this process is that you will not see any progress bars or other indicators to let you know when the export is finished. Your VMs will not be able to start until the export is completed. If you look in the destination that you specified, you will see a new folder containing the name of the VM that you are exporting. Open this folder.
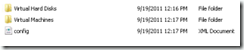
When the Config.xml file is created, the export is completed.
On the Hyper-v Manager, click Import Virtual Machine.
Select the folder and click Import.
You will now have a new VM that does not have any snapshots, but it will boot to the snapshot image you exported. This is not the base for this VM.

Let’s say that I want to create a new VM from this one. Apply the snapshot that you want to use as the base for the new VM. Right click the VM and select Export. Give it a location and click Export.
One thing that I do not like about this process is that you will not see any progress bars or other indicators to let you know when the export is finished. Your VMs will not be able to start until the export is completed. If you look in the destination that you specified, you will see a new folder containing the name of the VM that you are exporting. Open this folder.

When the Config.xml file is created, the export is completed.
On the Hyper-v Manager, click Import Virtual Machine.
Select the folder and click Import.
You will now have a new VM that does not have any snapshots, but it will boot to the snapshot image you exported. This is not the base for this VM.
Comments